
Tickets
Go to TicketsWhat the ticket system can do
In the ticket system (Ticket-System) you manage tasks and requests: you create tickets, prioritize them, assign them to people or an Agent, comment and move them through the statuses until they are done. Every ticket has a Title (Titel), optionally a Description (Beschreibung), a Priority (Priorität), a Category (Kategorie) and a sequential number such as #42.
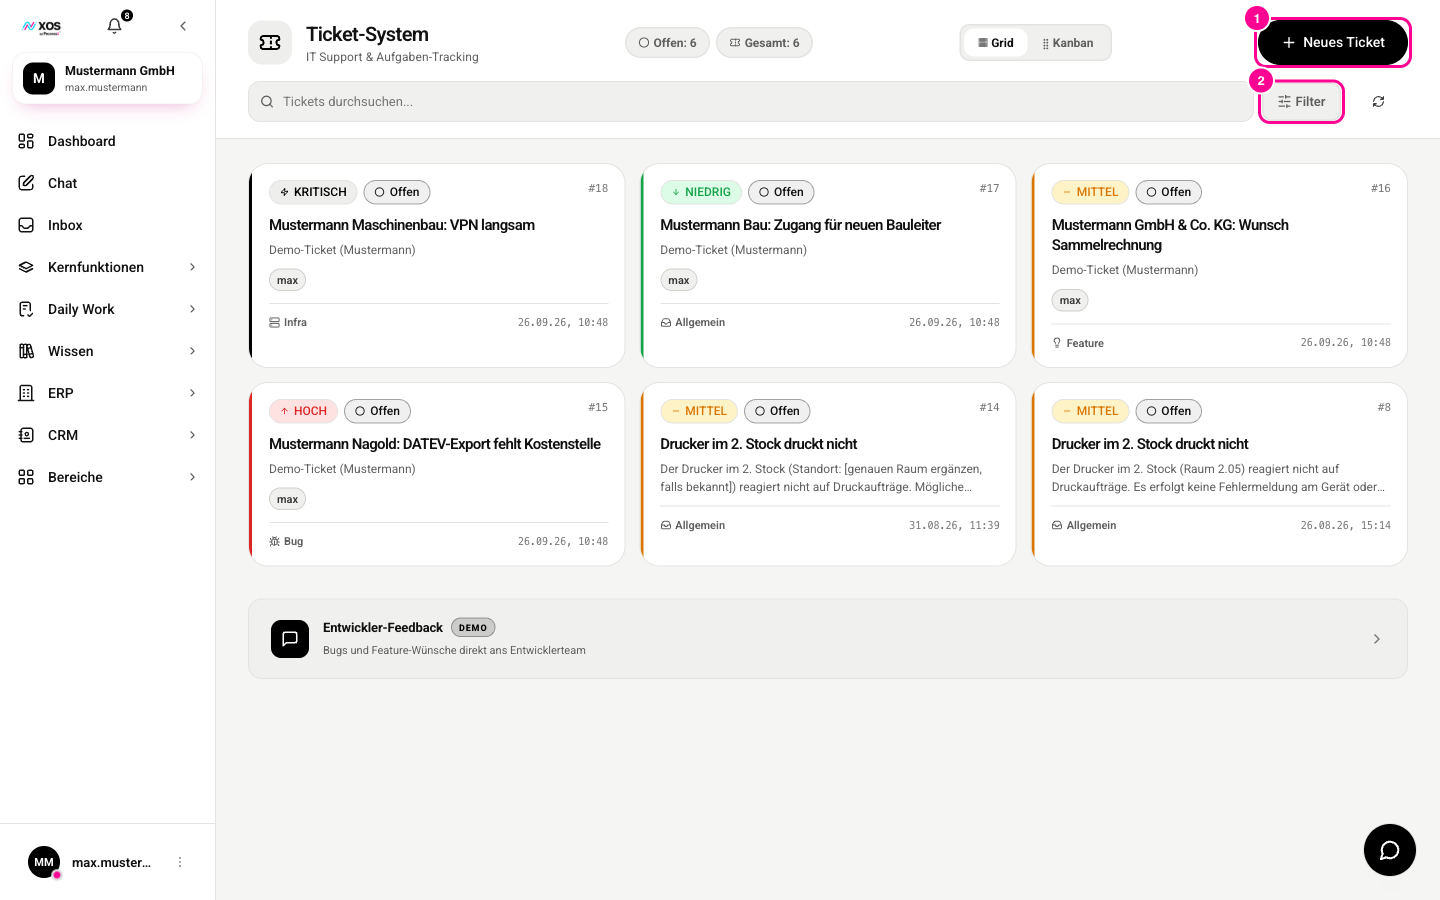
At the top are status pills with counters, for example Open: 4 (Offen: 4) and Total (Gesamt). Clicking a pill filters by that status, clicking it again removes the filter. The view refreshes itself every few seconds.
- Status: Open (Offen), In progress (In Arbeit), Confirmation needed (Bestätigung nötig, shown as Review in the pills), Resolved (Gelöst), Closed (Geschlossen)
- Priority (Priorität): Low (Niedrig), Medium (Mittel), High (Hoch), Critical (Kritisch)
- Category (Kategorie): General (Allgemein), Bug, Feature, Infra, Security
How do I create a ticket?
- Click New ticket (Neues Ticket) at the top right (marker 1). A dialog opens.
- Enter a Title (Titel). It is required (marked with *), and without it the create button stays inactive.
- Optional: add details under Description (Beschreibung).
- Choose a Priority (Priorität) (default Medium) and a Category (Kategorie) (default General).
- Optional, under Assign (Zuweisen): type a name and press Enter. Typing / shows a list of available Agents. Pick one to hand the ticket straight to it.
- Click Create ticket (Ticket erstellen). The ticket appears in the list right away.
How do I use views, search and filters?
Use the toggle at the top right to switch between Grid (cards) and Kanban (columns by status). In Kanban, drag and drop a card into another column to change its status. Alternatively, the small → [next status] (→ [nächster Status]) button on the card moves the ticket one step forward.
- Use the Search tickets... (Tickets durchsuchen...) field to search titles and descriptions.
- Click Filter (marker 2). The fields All statuses (Alle Status), All priorities (Alle Prioritäten) and All categories (Alle Kategorien) appear.
- Pick values and the list filters instantly. A small ! on the filter button shows that a filter is active.
- Reset, or Reset filters (Filter zurücksetzen) in an empty list, clears filters and search in one go.
How do I edit and assign a ticket?
Click a ticket card to open the Detail panel (Detail-Panel) on the right. It shows the description, category and creator, and lets you adjust everything important.
- Under Ticket info (Ticket Info), change the Status and Priority (Priorität) with the dropdowns.
- Under Assign (Zuweisen), add assignees or an Agent (type a name and press Enter, use / for agents). The x on an entry removes it again.
- Click Save (Speichern). If you assigned a new agent, it starts working.
- To comment, type in Add comment... (Kommentar hinzufügen...) and confirm with Enter or the send button. Comments appear above as a timeline.
- To delete, click the red trash icon and confirm the prompt.
How do agent processing and confirmation work?
When an Agent is assigned to a ticket, it works through the task on its own and posts progress updates as comments. The Chat button on the card or in the detail panel opens a chat window where you write to the agent under Message to agent... (Nachricht an Agent...) and follow the conversation.
When the agent is done, it sets the ticket to Confirmation needed (Bestätigung nötig). These tickets are highlighted, and a banner with a direct link appears at the top. Your confirmation is the final step.
- Open the highlighted ticket (card, banner button View #.. (#.. ansehen) or detail panel).
- Check the result in the comments or in the chat.
- Click the purple Confirm (Bestätigen) button. The ticket is set to Closed (Geschlossen).